Apply ControlNet node in ComfyUI is designed to provide additional visual guidance to a diffusion model, enhancing the control over the image generation process.
Introduction
Apply ControlNet node in ComfyUI is designed to provide additional visual guidance to a diffusion model, enhancing the control over the image generation process. Unlike unCLIP embeddings, controlnets and T2I adaptors are versatile and can be applied to any model, which allows for more precise control over the generation.
The node functions by taking an image containing specific visual cues, such as edge detection or segmentation, and combining it with a controlNet or T2IAdaptor that has been trained to interpret these cues. This combination guides the diffusion model to generate images that align with the provided visual guidance, such as ensuring edges are placed correctly in the final image.
Inputs
| Name | Explanation |
|---|---|
conditioning |
A conditioning to be applied. |
control_net |
A loaded controlNet or T2IAdaptor model trained for specific guidance. You can load the model by the Load ControlNet Model node. |
image |
The visual guide image that influences the diffusion model. You can use some preprocessor nodes (for example, the AIO Aux Preprocessor node) to get a guide image if you don’t have one. |
strength |
The influence or intensity of the control exerted by the controlNet or T2I adapter on the diffusion model during the image generation process. |
strength
The strength parameter is a powerful tool within the Apply ControlNet node that allows users to dial in the exact level of guidance they want to apply to their image generation process in ComfyUI.
Typically, the strength parameter ranges from 0.0 to 2.0. The greater the value of strength, the stronger the control.
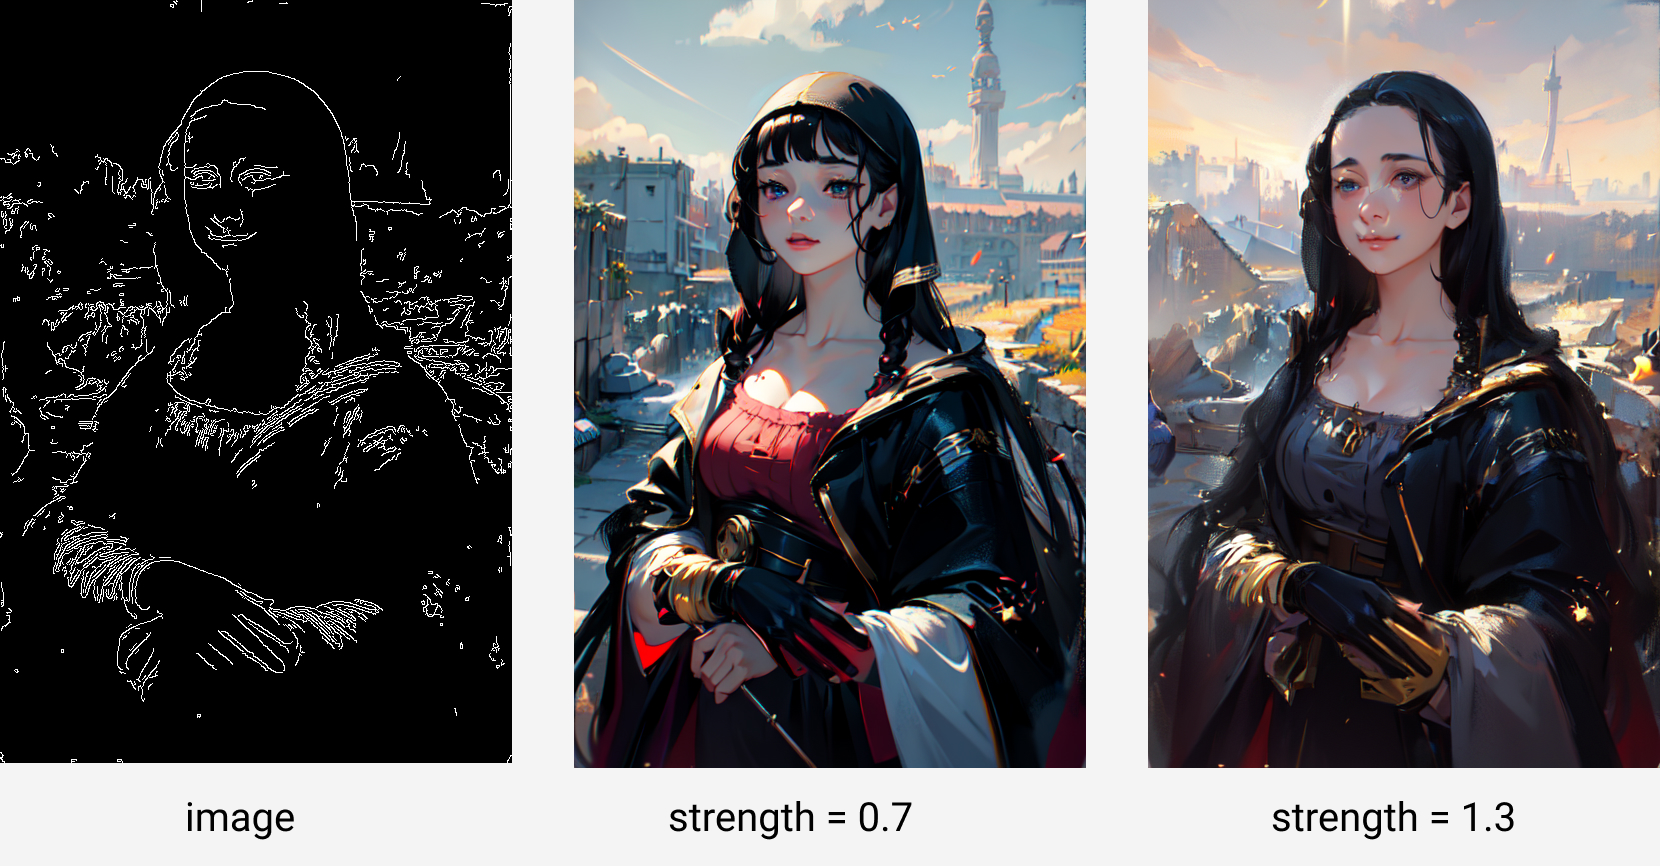
The above picture shows the results of using Canny controlNet to control the image generated under different strength settings.
The image on the left is the input passed to the image parameter of the Apply ControlNet node. It is a line extracted from the famous painting Mona Lisa smile. The Canny controlnet can control the outline of the generated image to remain similar to this image.
The pictures in the middle and on the right are those generated when strength=0.7 and strength=1.0, respectively.
Outputs
| Name | Explanation |
|---|---|
conditioning |
The modified conditional data after applying the ControlNet transformation, reflecting the enhancements made based on the input parameters. |
How to Use
Use Single ControlNet
The Apply ControlNet node is typically used in conjunction with the following nodes:
- AIO Aux Preprocessor: This node is a comprehensive image preprocessing node that extracts the image information required for the controlNet from the image. It is usually necessary to connect the output of this node’s
imageto the input of the Apply ControlNet node’simageto pass the extracted image information to the controlnet. You can use other nodes for image preprocessing as a substitute for this node, such as the Canny Edge, Zoe Depth Anything, and DWPose Estimator nodes, etc. Note that the preprocessor you choose should match the controlnet you are using. - Load ControlNet Model: This node can load the controlnet model you need.
In practice, you can implement control over image generation through the controlnet by adding the aforementioned nodes to your existing workflow.
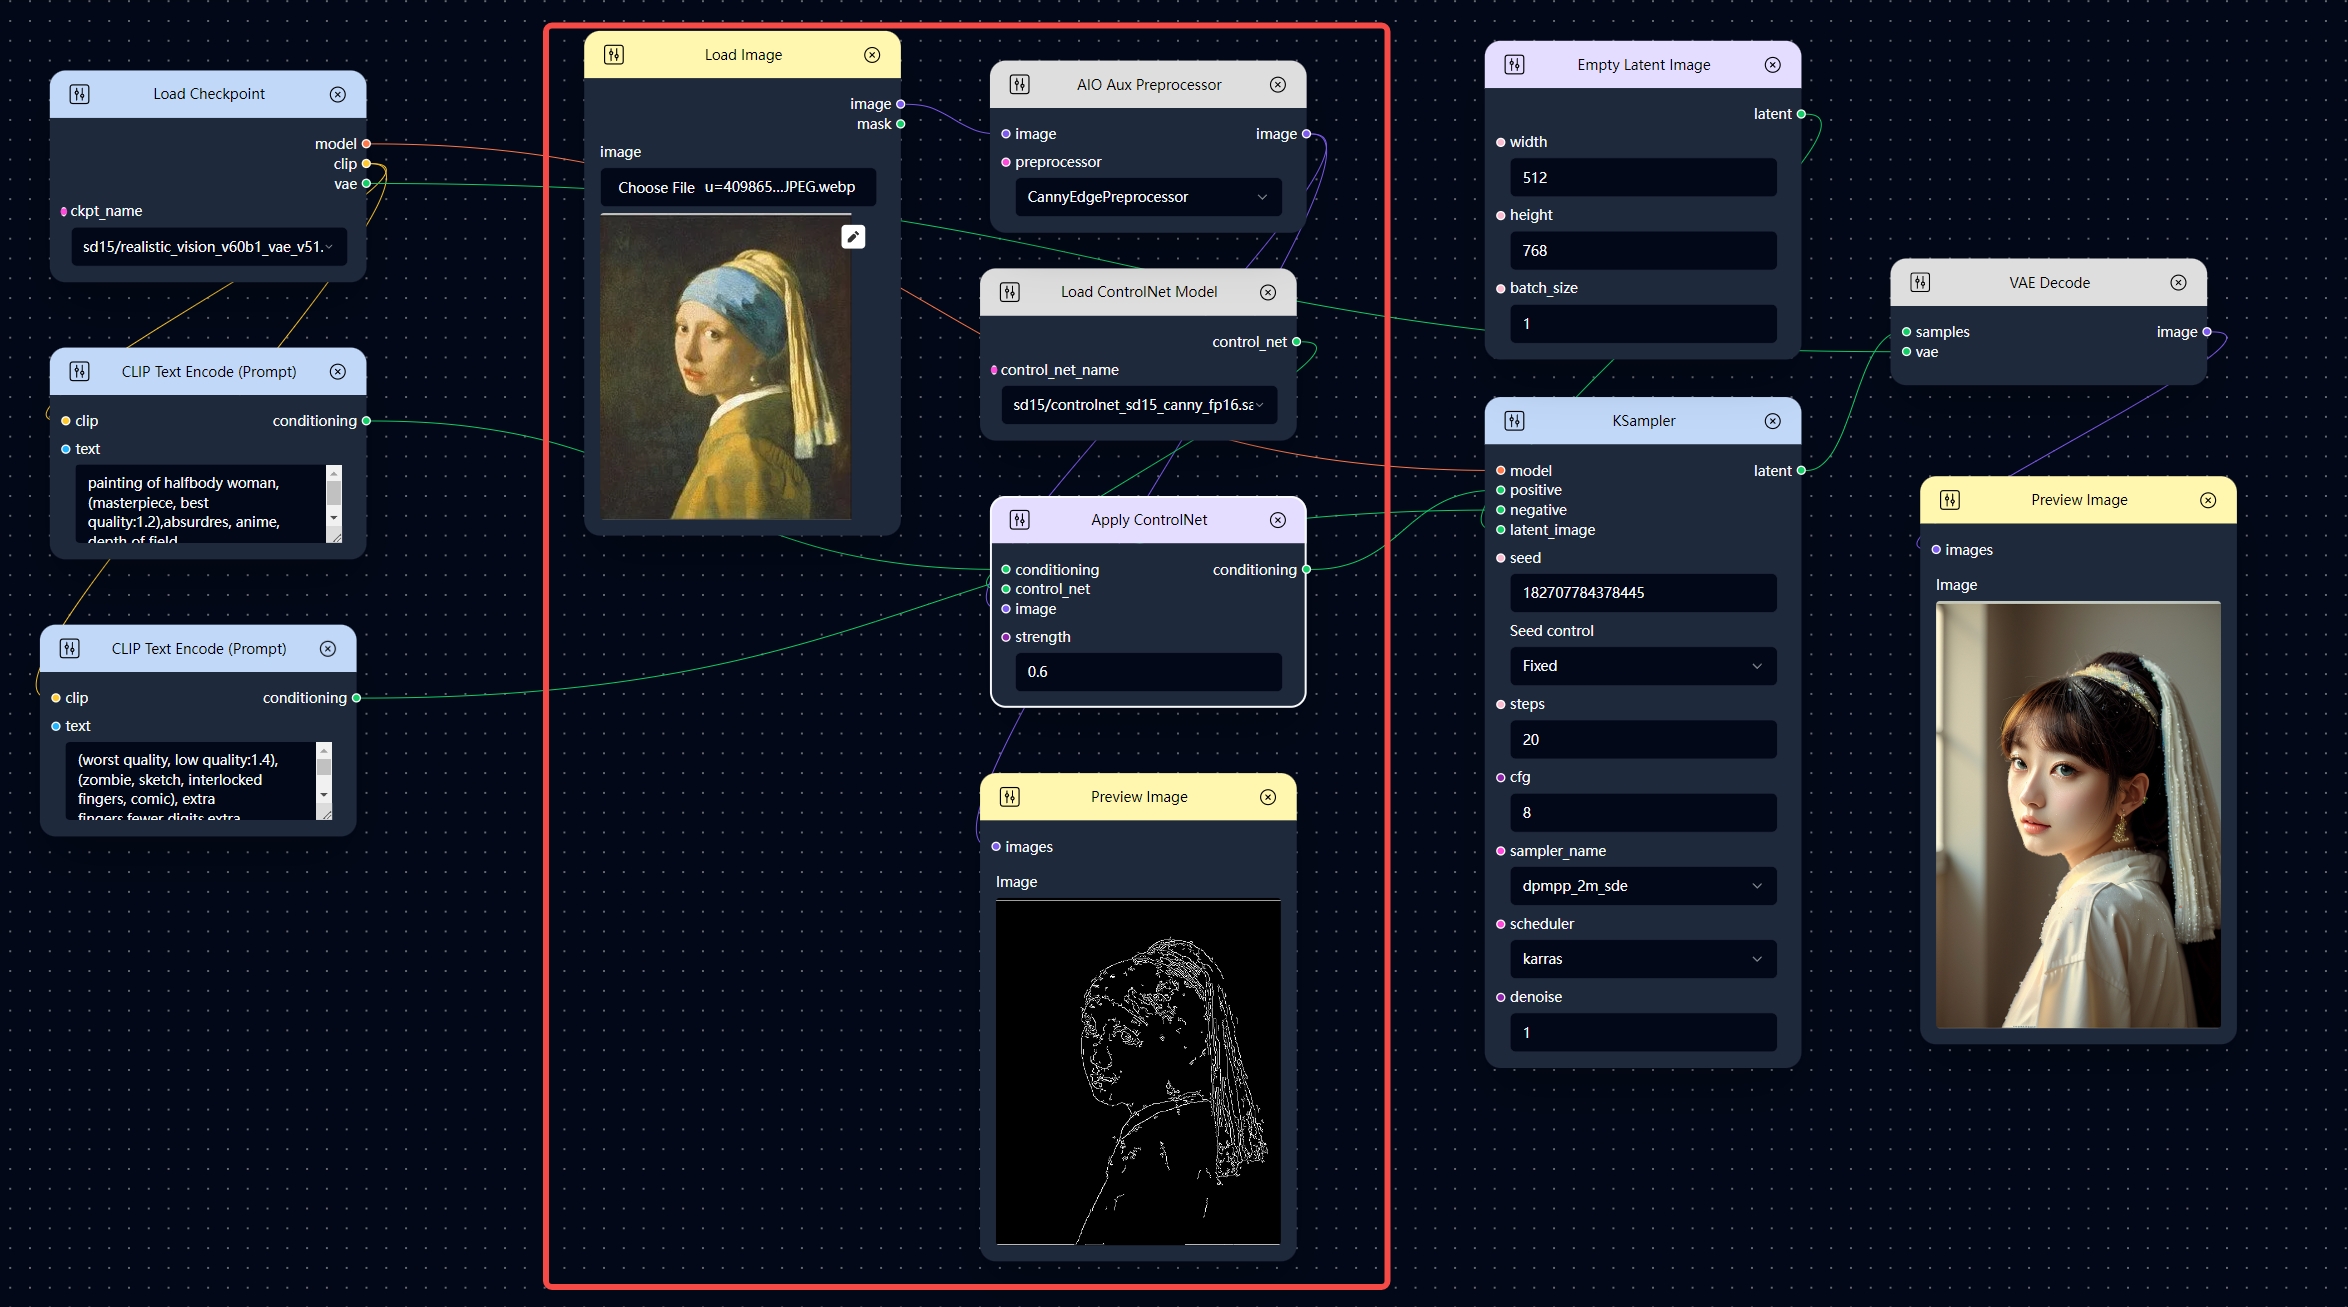
Here is an example workflow based on the above, which is obtained after adding several controlnet-related nodes (the nodes in the red box in the figure) to the image generation workflow.
Different from the ordinary image generation workflow, the positive conditioning data is not directly connected to the KSampler node’s positive input, but is connected to the conditioning input of the Apply ControlNet node, and then the conditioning data after applying the controlnet is passed to the KSampler.
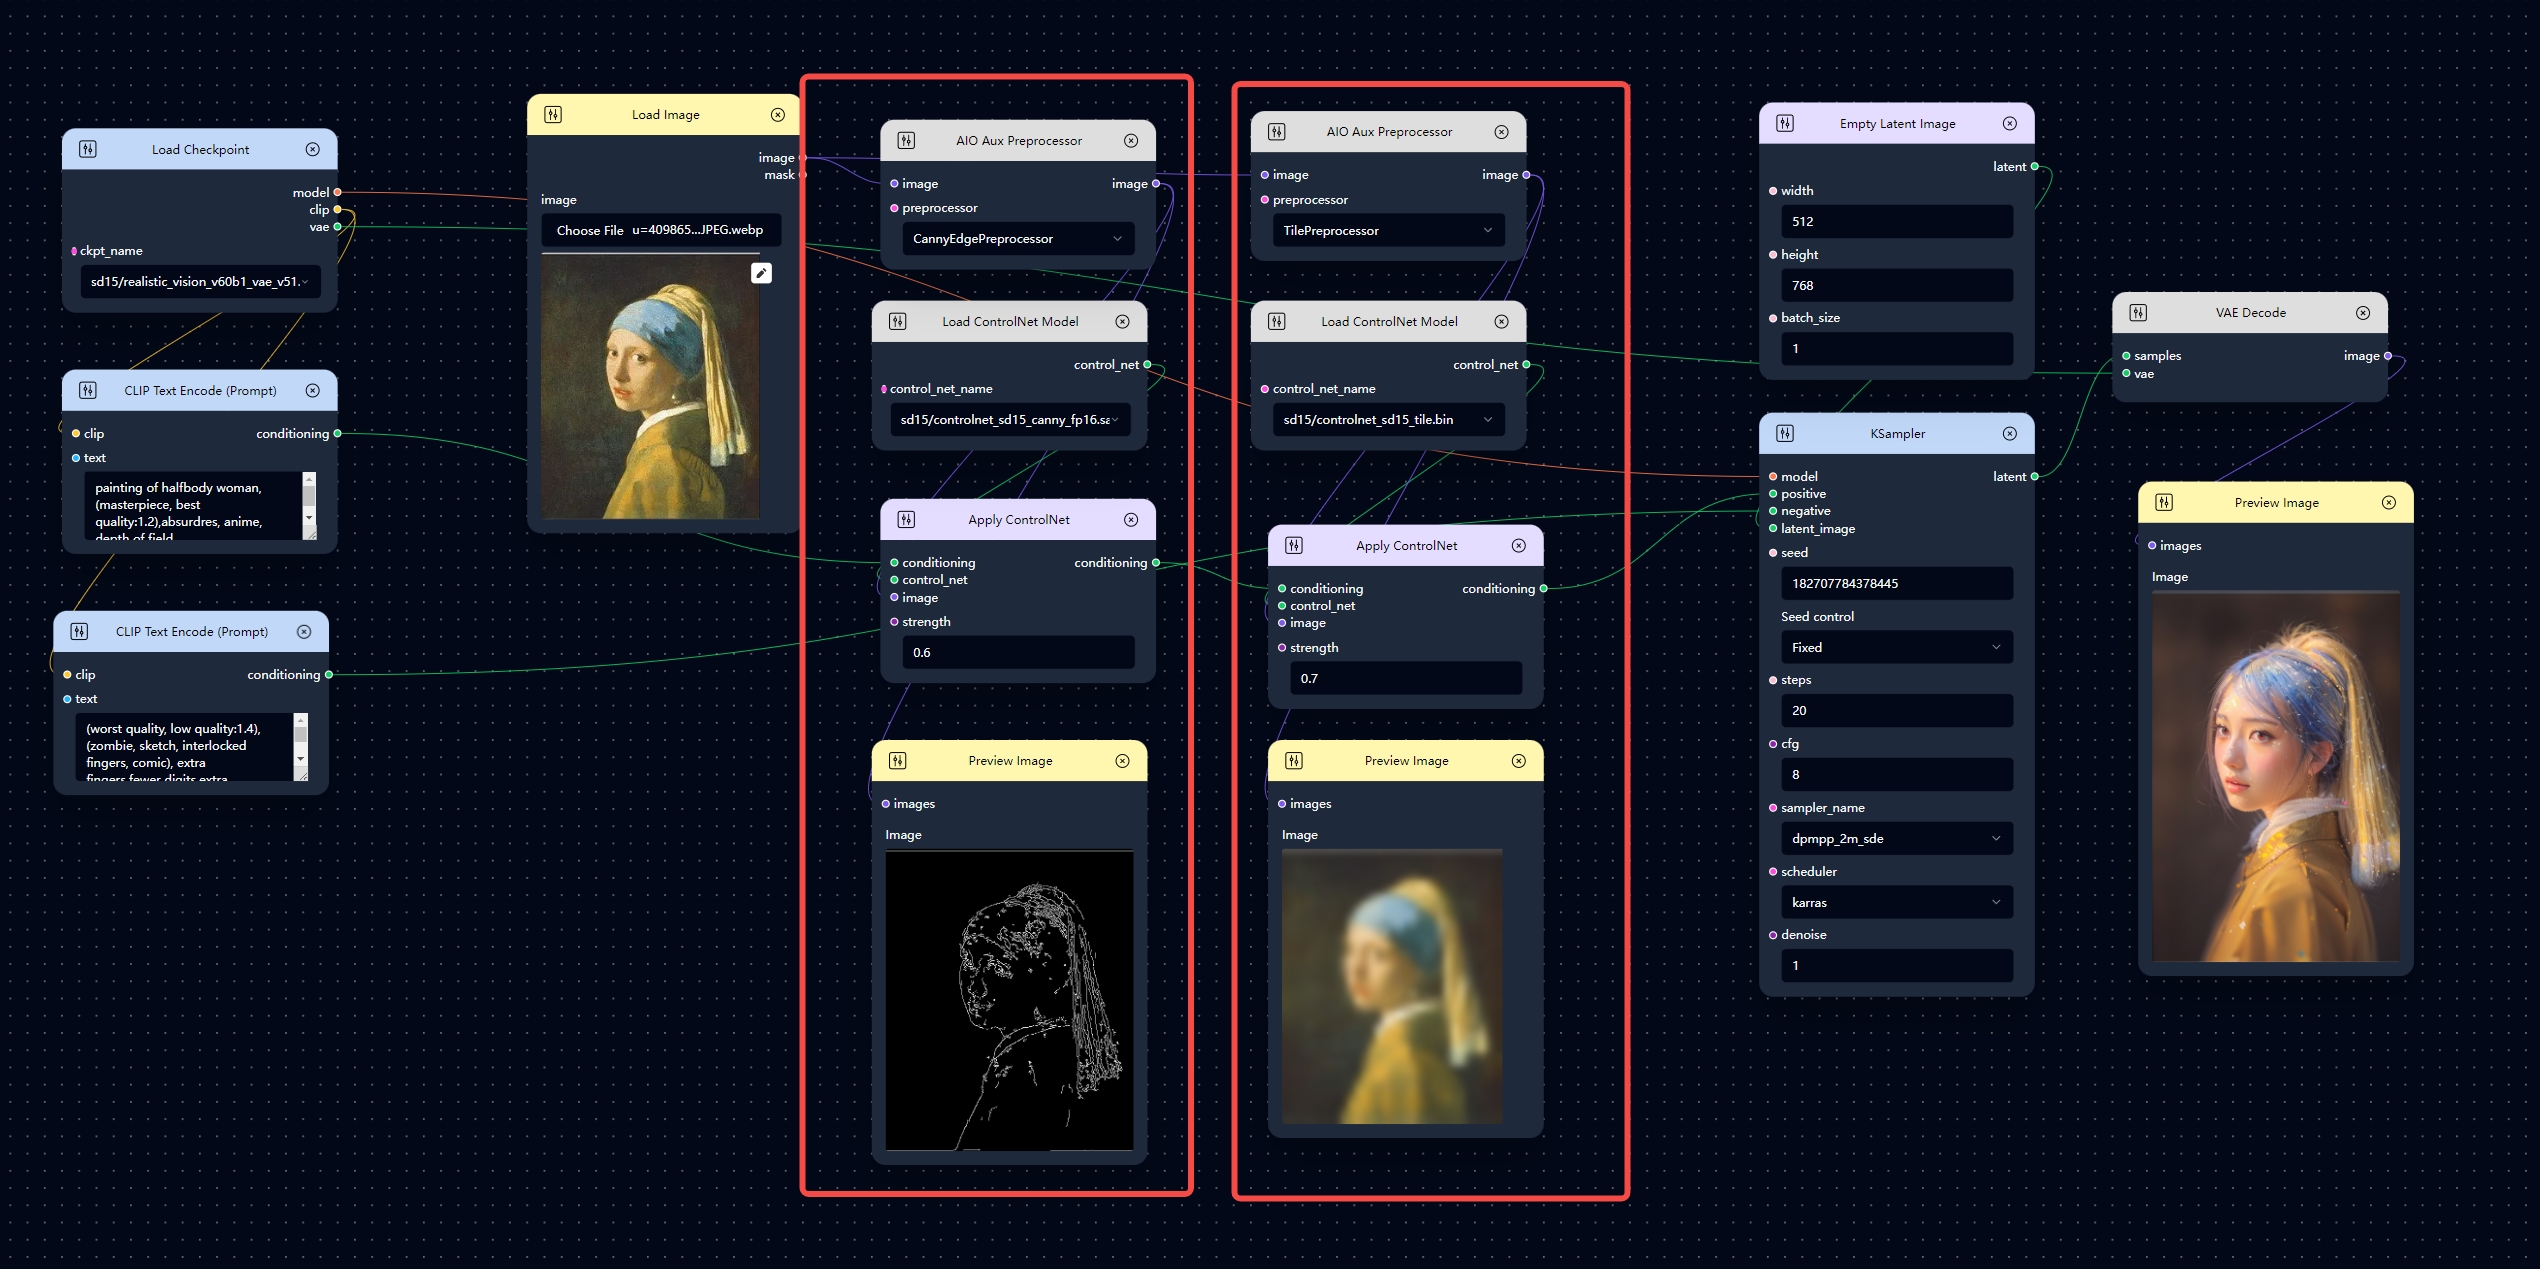
Use Multiple ControlNets
The process of using multiple ControlNets is similar to using a single ControlNet. You simply need to add another set of AIO Aux Preprocessor, Load ControlNet Model, and Apply ControlNet nodes, and then connect those ControlNet nodes in series to process the conditioning data sequentially.
Here is an example of using multiple ControlNets. In the workflow below, the positive conditioning data is sequentially applied with Canny ControlNet and Tile ControlNet. Compared to using only one Canny ControlNet, adding the Tile ControlNet provides more control over the style and details of the generated image.
Adanced Usage
The Apply ControlNet node has an advanced version called Apply ControlNet (Advanced) node. With this node, you can additionally control when the current ControlNet will take effect. For more details, please refer to the relevant instructional documentation.