KSampler node is a fundamental component used for generating new versions of latent images through a process known as denoising.
Introduction
The KSampler uses the provided model and positive and negative conditioning to generate a new version of the given latent.
It operates by introducing noise into the latent image according to a specified seed and denoise strength, partially erasing details of the image.
Subsequently, this noise is removed using a provided model and conditioning factors, which guide the generation of new details where the image was previously obscured by noise.
Inputs
| Name | Explanation |
|---|---|
model |
The model used for denoising. |
positive and negative |
Conditioning factors that influence the generation process. |
latent_image |
The initial latent image that will be denoised. |
seed |
A random seed for noise creation. |
control_after_generate |
Determines how the seed number changes after each prompt. |
steps |
The number of steps used in the denoising process, which affects the accuracy of the result. |
cfg |
The classifier-free guidance scale that dictates how aggressively the sampler realizes the content of the prompts. |
sampler_name |
Specifies which sampler to use. |
scheduler |
The type of schedule for the sampling process. |
denoise |
The degree to which information in the latents is erased by noise. |
Outputs
| Name | Explanation |
|---|---|
Refined Image |
The denoised latent space image. |
How to Use
Text to Image workflow
The Text to Image workflow is one of the most commonly used and basic image generation workflows. You can use this workflow as an example to understand the basic use of the KSampler node.
Typically, the KSampler node is used with the following nodes:
- Load Checkpoint: This node provides a loaded diffusion model for KSampler.
- CLIP Text Encode (Prompt): It can encode a text prompt using a CLIP model into an embedding. It provides a conditioning embedding for the sampling process that KSampler perform that can be used to guide the diffusion model towards generating specific images.
- VAE Decode: The KSampler node outputs a denoised latent image which is an internal image representation, and we need to decode this latent image data into ordinary image data before we can view it.
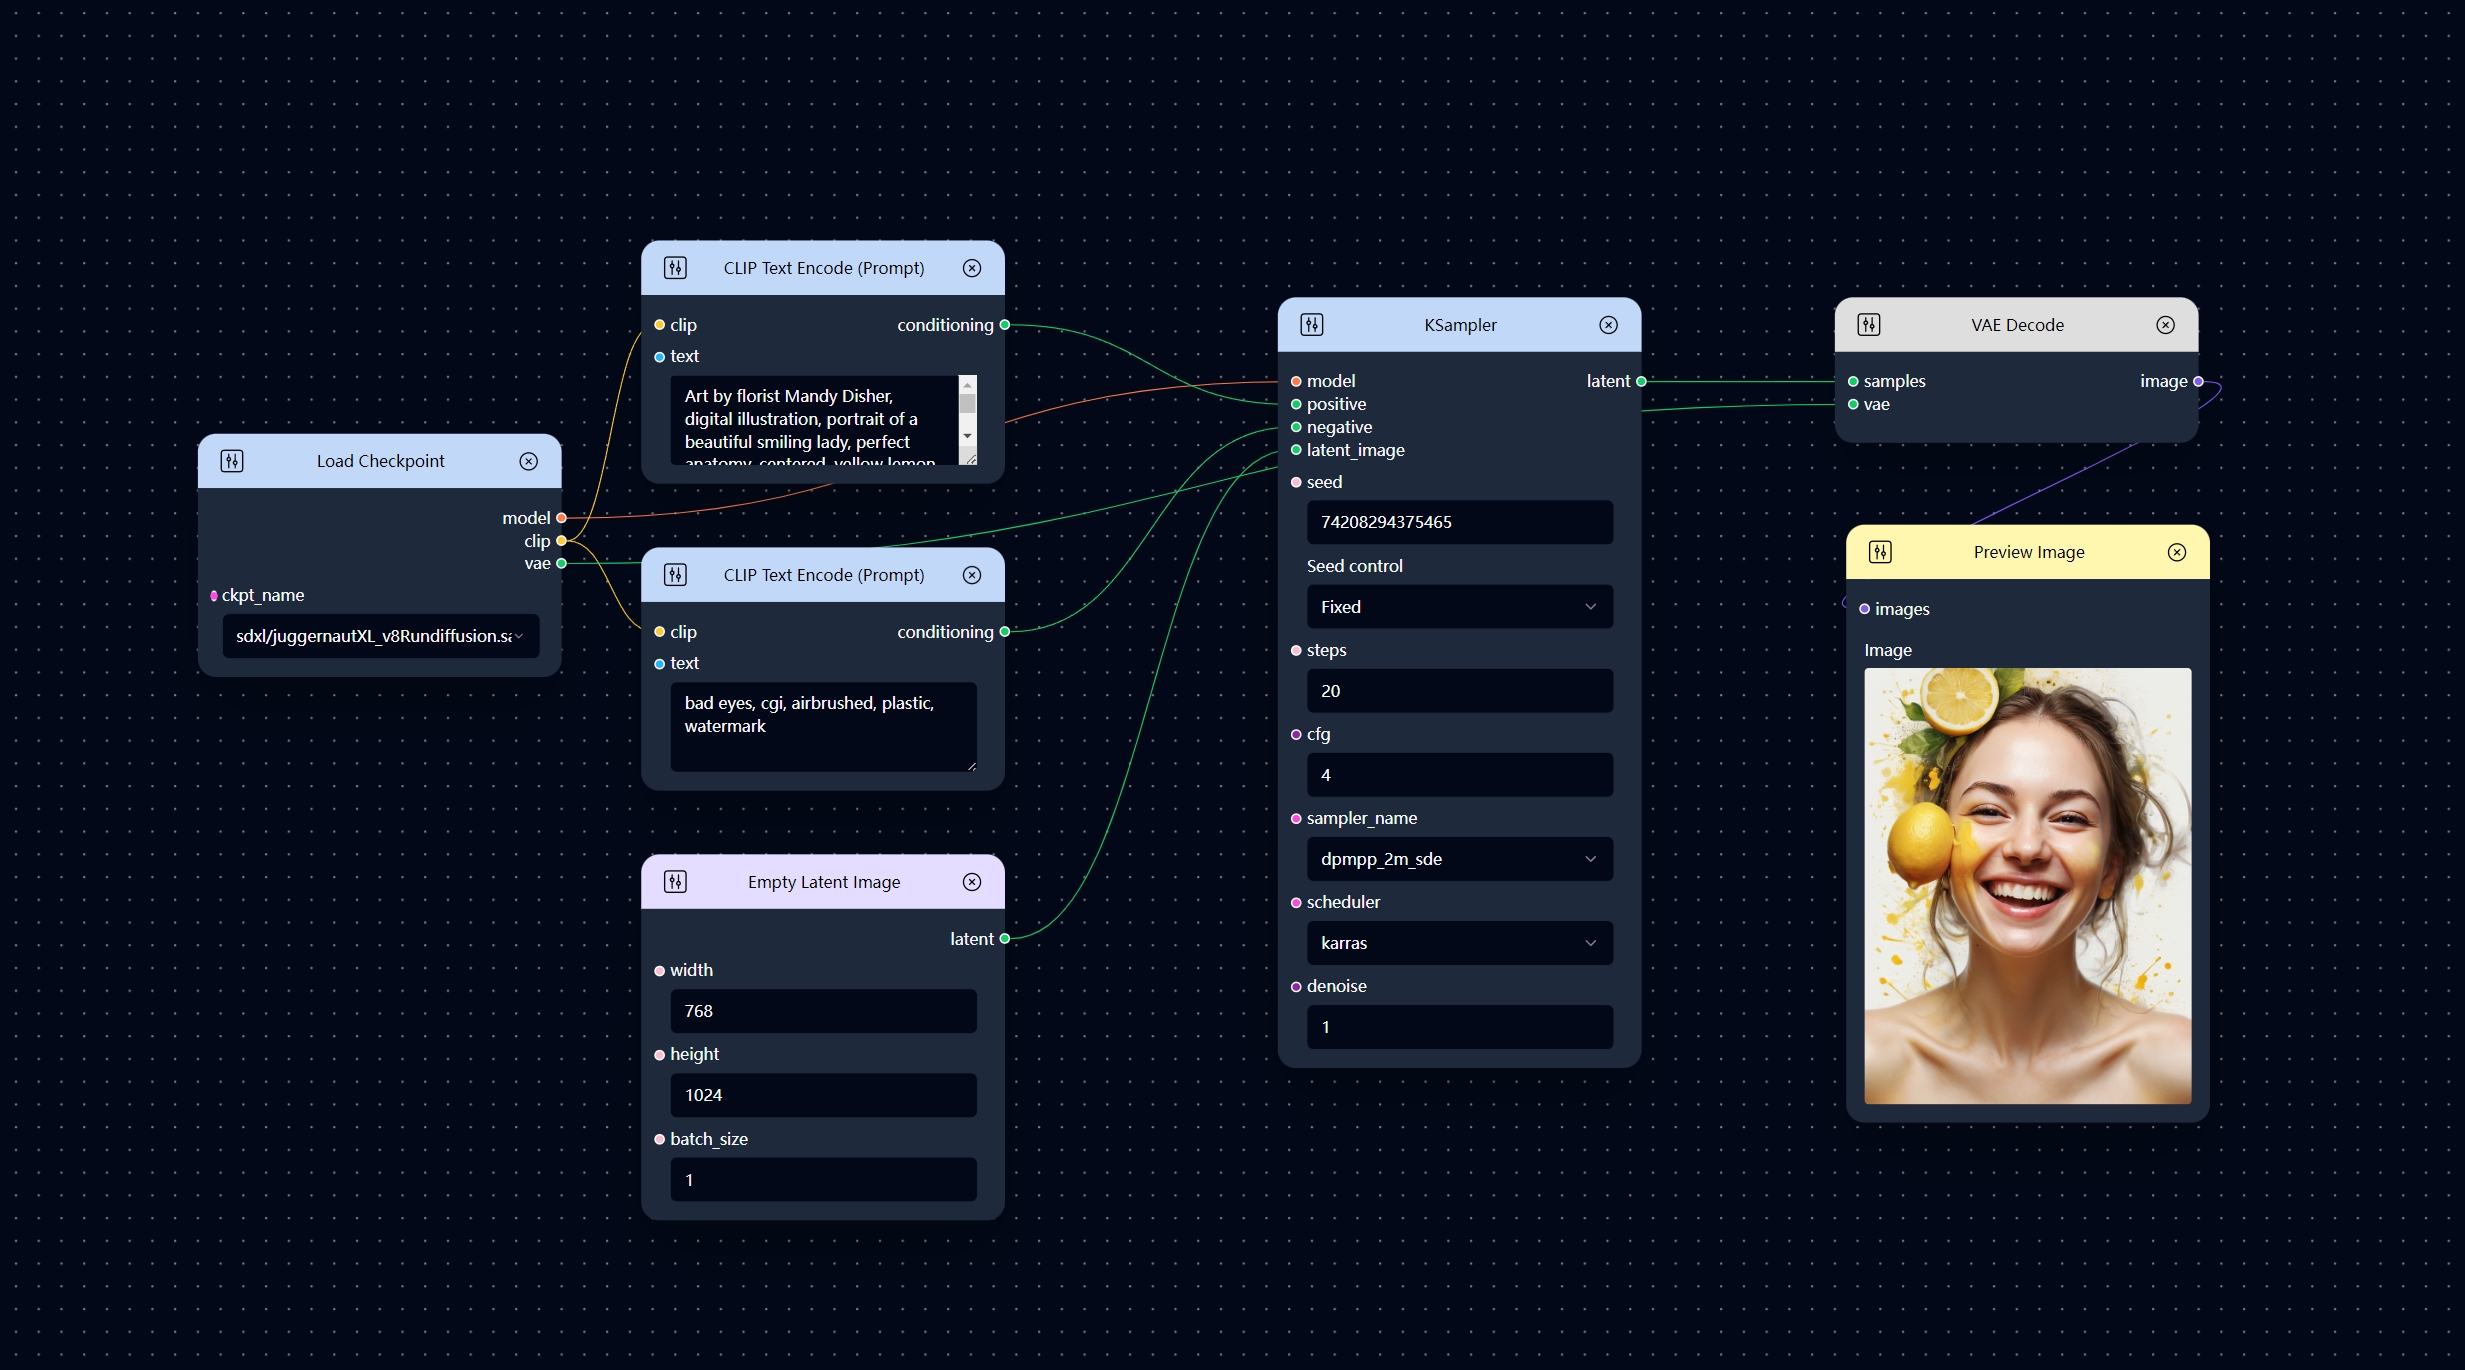
The example workflow shown above is a simple Text to Image workflow.
The KSampler node required a latent image input, you can use create a empty latent image as its input image by using Empty Latent Image node as illustrated in the Text to Image workflow. By doing this, you will generate an image from a blank initial image, and the generated image content will be largely determined by your text prompt.
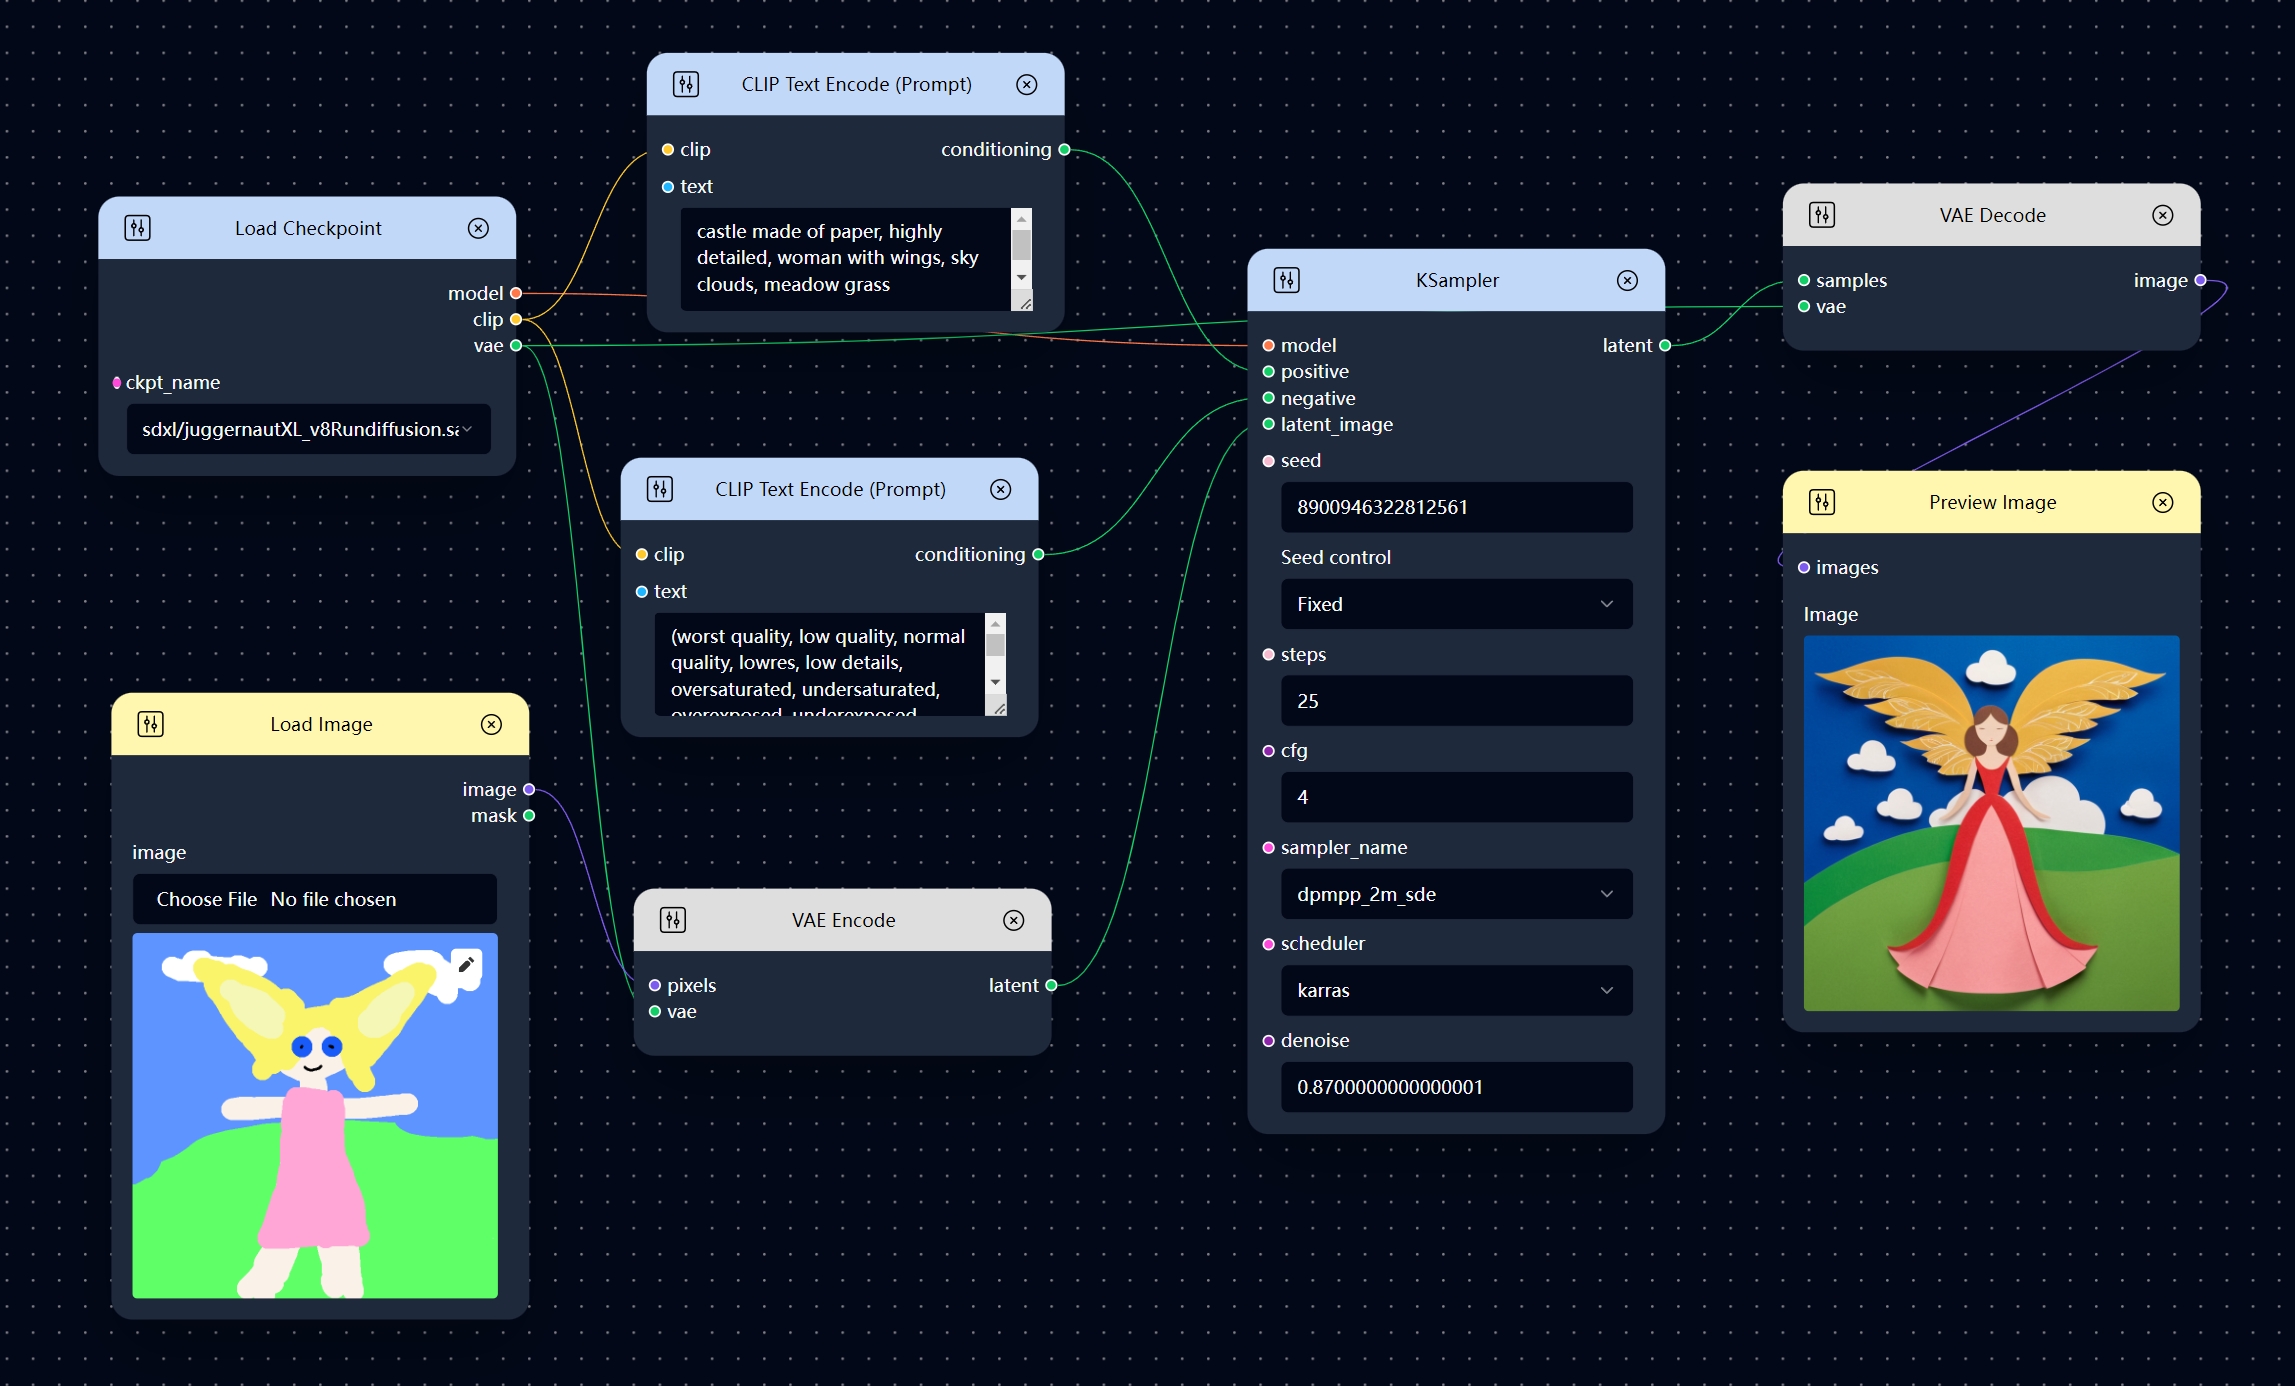
Image to Image Workflow
You can also use a non-blank image as your initial image. And this kind of workflow is Image to Image workflows.
Text prompt is also required to guide image generation in the Image to Image workflow. But in addition to text prompt, the initial image can also have a significant impact on the image generation depending on the value of the denoise parameter in the KSampler node.
The smaller the denoise parameter is set, the less the resulting image will differ from the original one. denoise=0 means that the resulting image is exactly like the original image, and denoise=1 means that the resulting image is completely unaffected by the original image.
In general, denoise=0.5-0.9 is a suitable parameter range for a Image to Image workflow.
Advanced Usage
The Text to Image and Image to Image workflows are the basic of many advanced workflows. Besides text prompt, you can add additional controls to guide your image generation, such as controlnets, ipadapters, and so on.
For a more detailed explanation of these controls, please refer to the relevant tutorial documentation.