The Combix Editor is the primary area of Combix.ai for creating, editing, and runing your AI workflows.
Node Panel
The node panel, located on the left of the editor, contains all the node supported by Combix. You can find the nodes you need in this panel, and then drag them into the main editor field to add those nodes into your workflow.
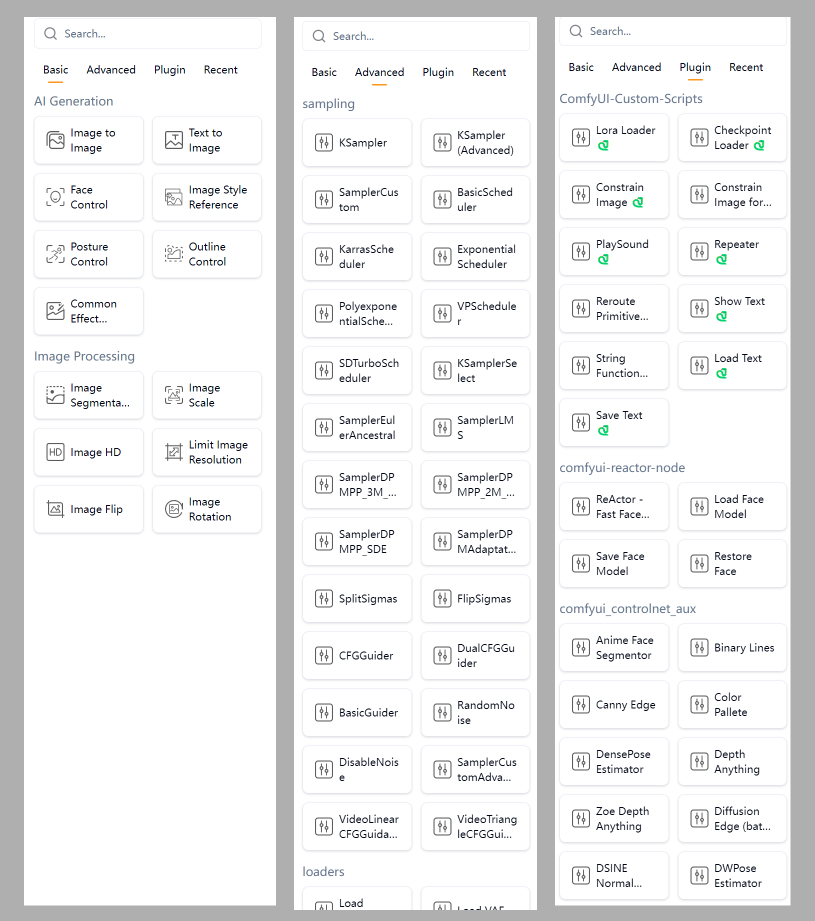
There are 3 types of nodes in Combix:
- Basic: Combix’s easy-to-use node for non-developers. Non-specialists can easily use these nodes as a starting point for their AI workflows.
- Advanced: Some nodes supported by ComfyUI project, including: KSampler, Load Image, Preview Image and other commonly used nodes in ComfyUI.
- Plugin: We support some widely-used extensions in Comfyui, and we provide nodes of these extensions under the Plugin.
Search Node
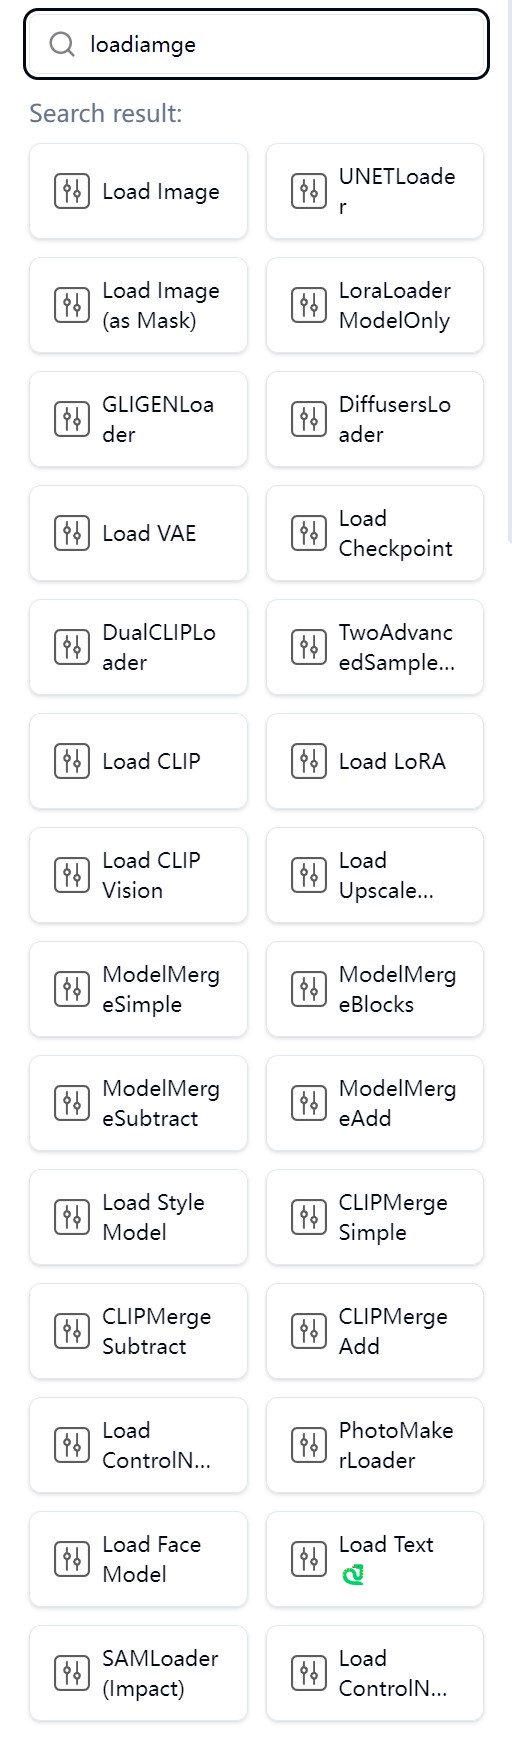
Combix support 300+ nodes in the editor. To find the node you want faster, you can search nodes by node name in the Node Panel.
Edit Panel
The edit panel, located on the center of the editor page, is where most of the editing take place.
Most of editing operation are similar to ComfyUI and other node systems. You can drag workflow node, link outputs with inputs, and adjust node parameters.
Shorcut Keys
In addition to the common drag-and-drop editing operations, Combix editor also supports some shortcut operations, listed in the following table:
| Keybind | Explanation |
|---|---|
| Delete | Delete selected nodes and links. |
| ctrl + Click | Add clicked node to selection. |
| Shift + Drag | Select multiple nodes. |
Detail Panel
The detail panel, located on the right of the editor, provides node descriptions and quick editing of the advanced parameters of the selected node.
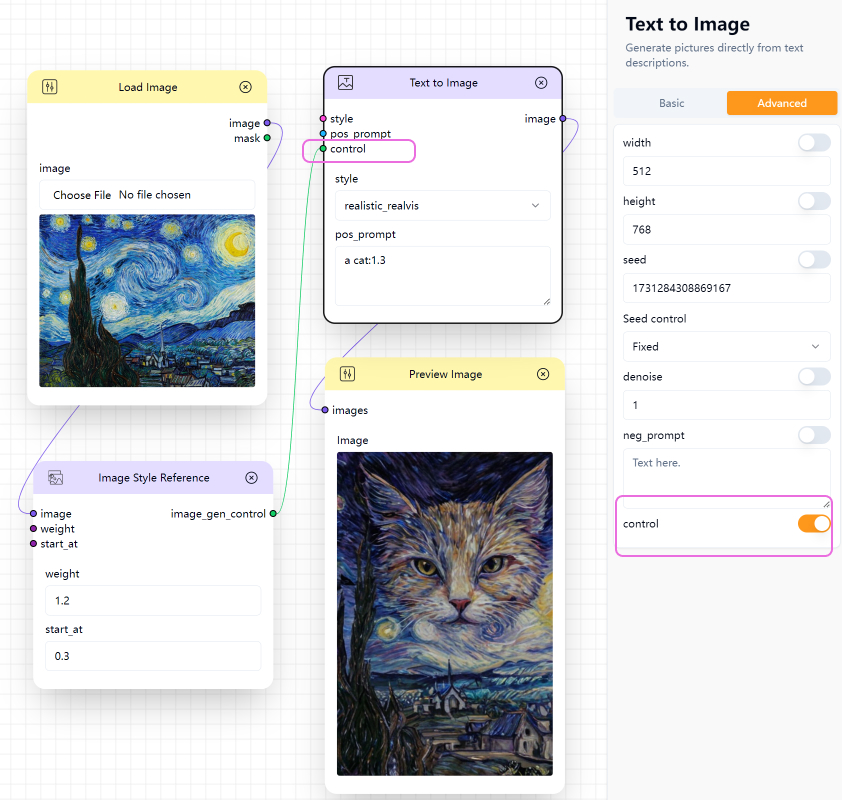
For example, when you click the Text To Image node, the detail panel displays the following content.
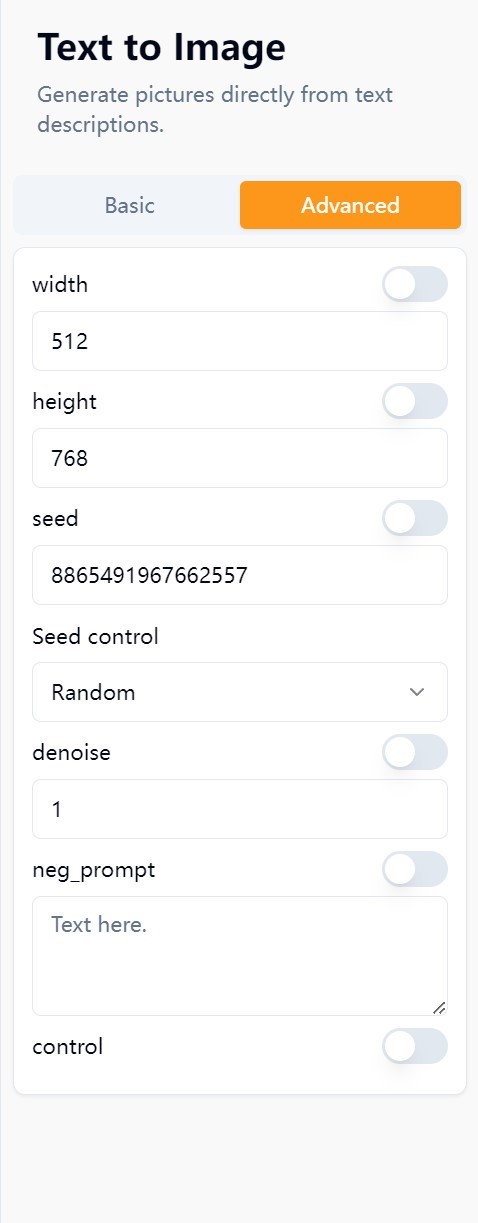
For some nodes, only the basic parameters are displayed on the node in the Edit Panel. If you are advanced user, and you want to further adjust the functionality of the node, you can adjust the more specialized parameters in the detail panel.
Basic Inputs and Advanced Inputs
We divide the parameters of nodes in Combix into two categories:
- Basic Inputs: are the most important parameters that need to be adjusted frequently. You can just tweak these parameters and get some pretty good results.
- Advanced Inputs: If you fail to get a satisfactory result, you can try to modify adcanced parameters on the detail panel.
By default, advanced parameters in the detail panel are not displayed on the nodes in the edit panel. This helps to provide a simple and clear editing interface to non-advanced users.
Advanced Usage (Example)
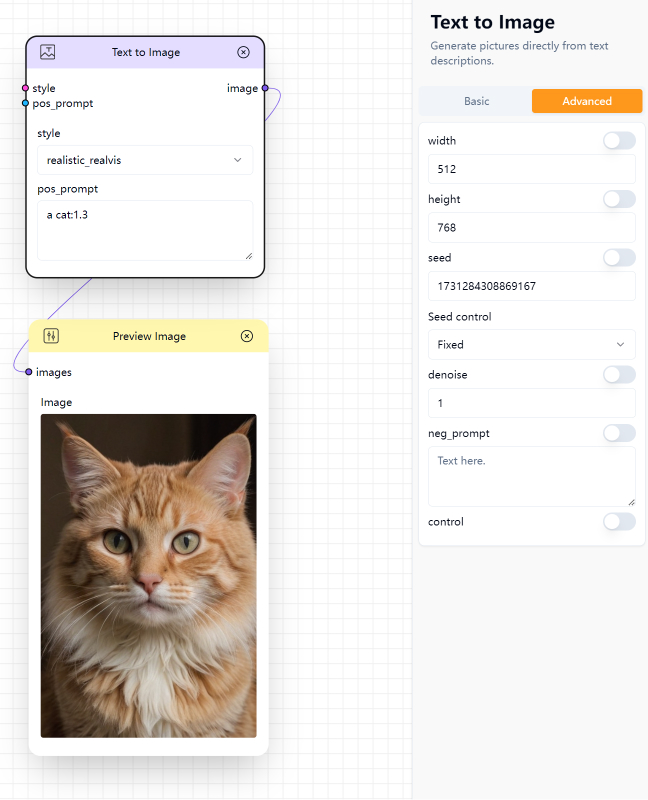
By turning on the switch of the advanced parameter on the detail panel, you can make arbitrary parameters appear on nodes in the edit panel.
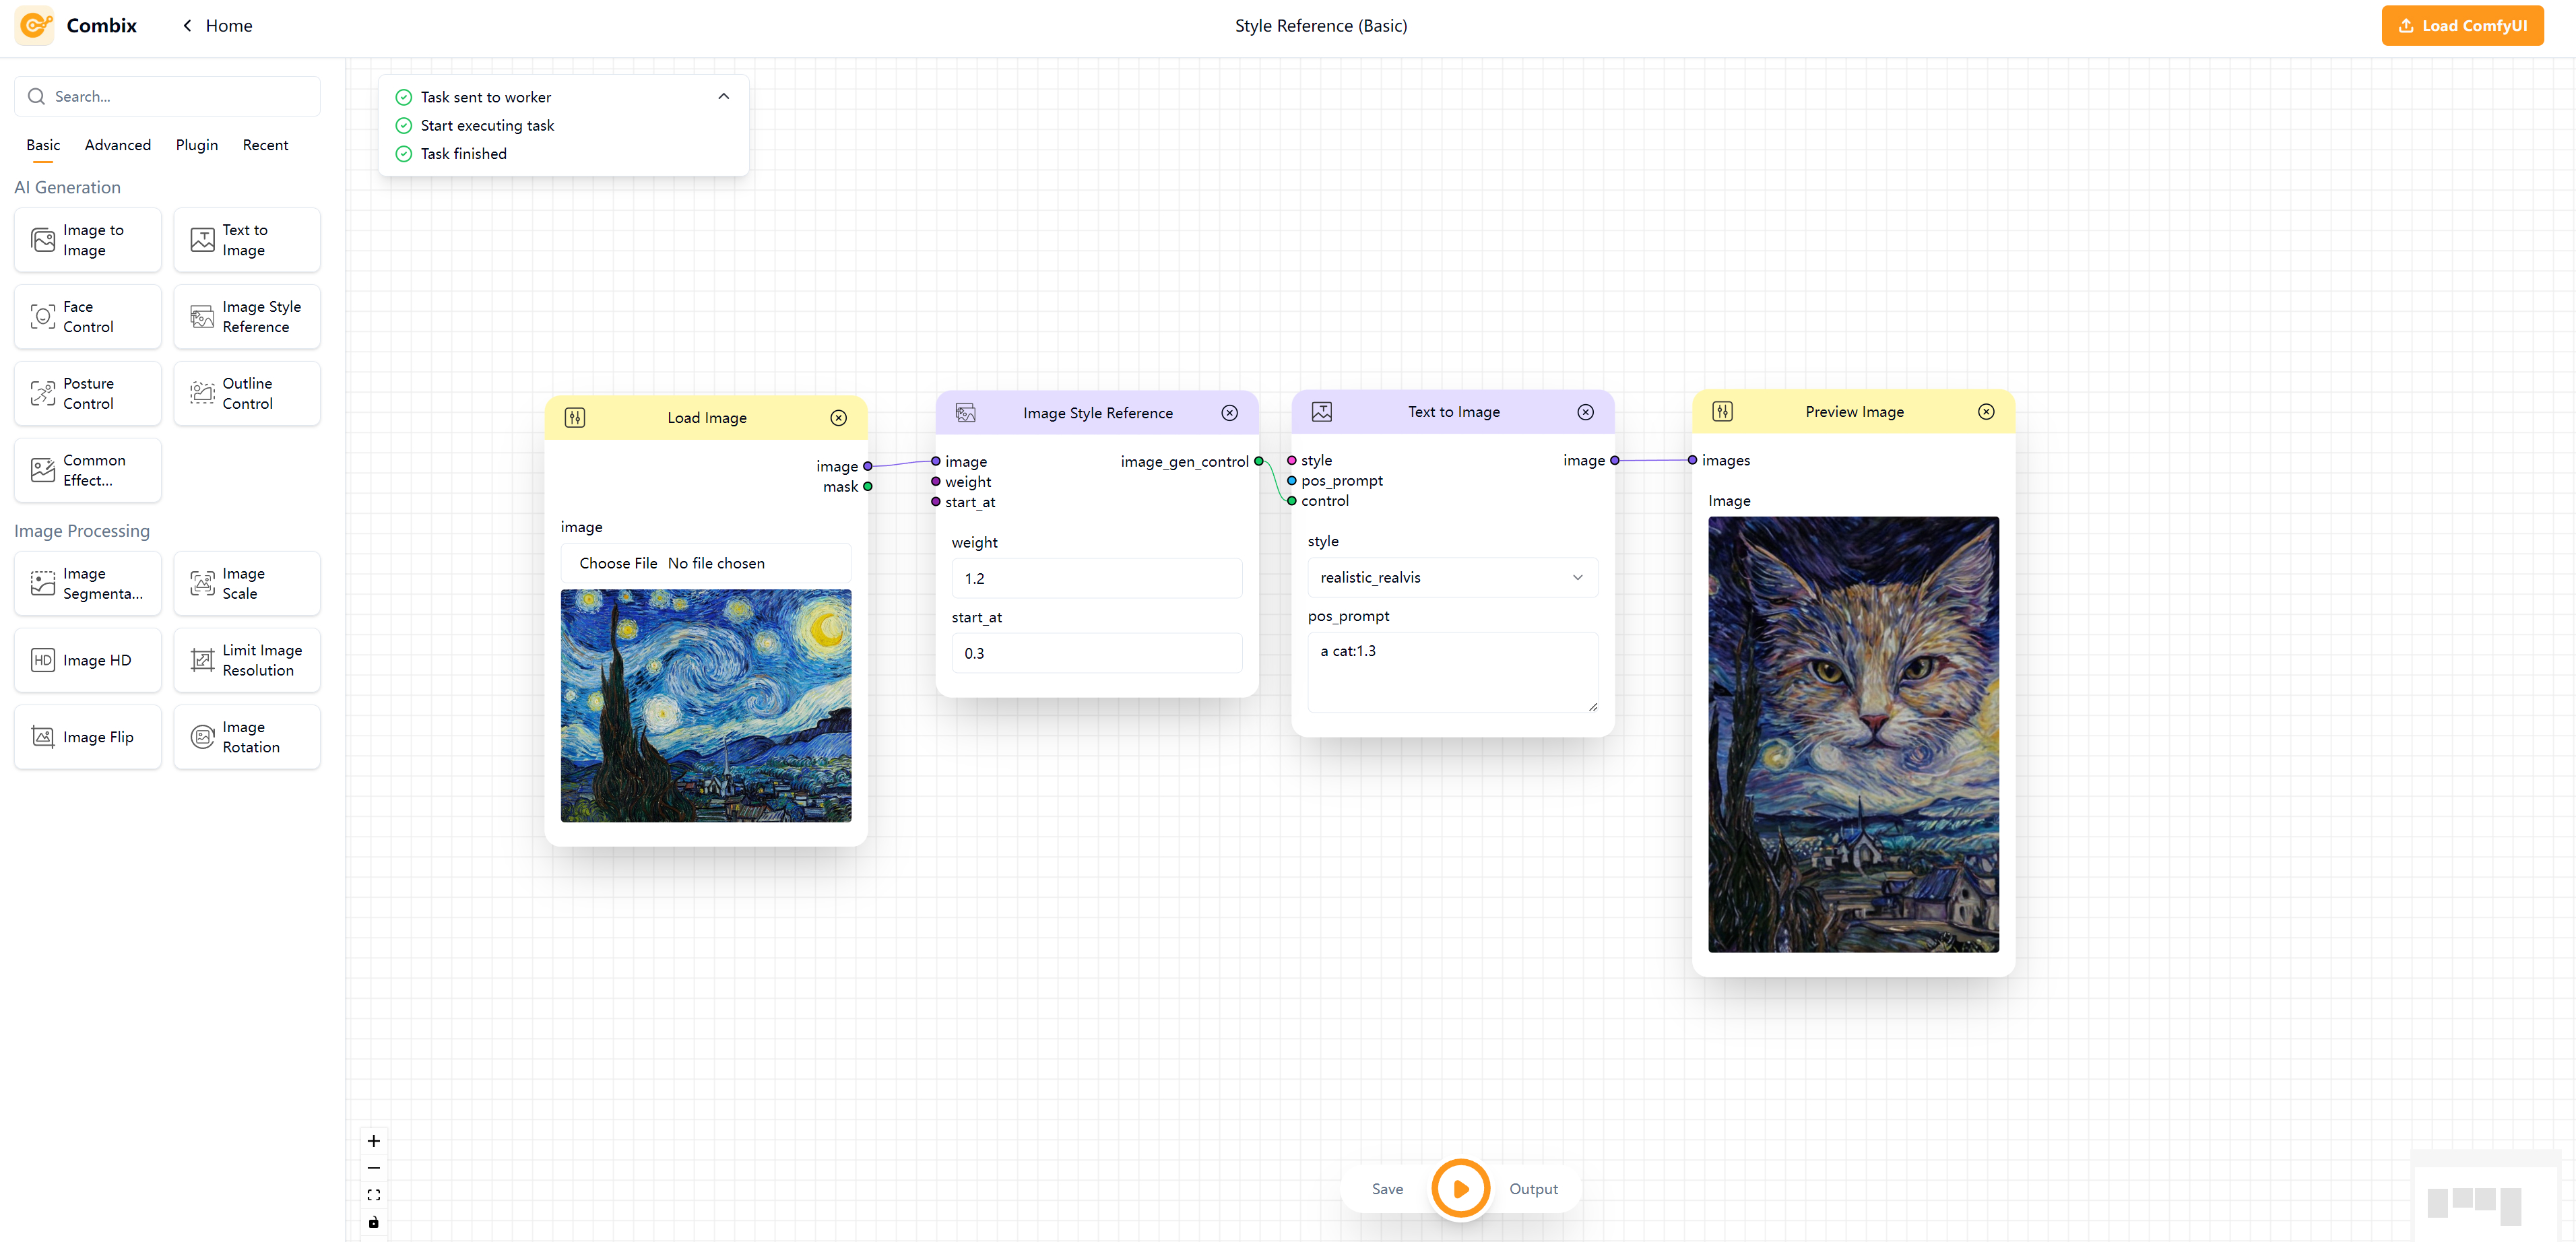
Text to Image (Basic): The workflow below uses Text to Image node to create an image of a cat. By default, the input control is not shown on the node.
Style Reference (Basic): Another example is using style reference to control the style of the generated image, as shown below. In the workflow below, the switch of control input is flipped. The output of Image Style Reference node is connected to the control input of the Text to Image node.